Configure the iOS SDK
Installation steps
The steps to include the SDK are:
1) Add the xcframeworks, bundle and files included in the SDK distribution folder to your project.
You can just drag and drop the libs folder in the SDK to your project.
Note: Please note that if you add the whole libs folder all frameworks will be included. It is better if you add the basic frameworks and you add the rest once you need them. The basic frameworks you'll need, along with MobbScanSDK-iOS.bundle are:

Please note that every MobbScan XCFramework are now dynamic frameworks, so they must be included checking the Embed & Sign option.
Note: There are optional features in the SDK that will require additional configuration, such as liveness face validation, among others. Each feature will explain what it needs to be configured in the Getting Started section.
2) Add the required literals to your Info.plist file.
MobbScan SDK needs to access your camera for document detection, so you need to give your aplicacion access to those resources. In order to do so, you need to add the following literals to your Info.plist file:
  <key>NSCameraUsageDescription</key>
    <string>Used to scan documents</string>
Troubleshooting
Framework cannot be found

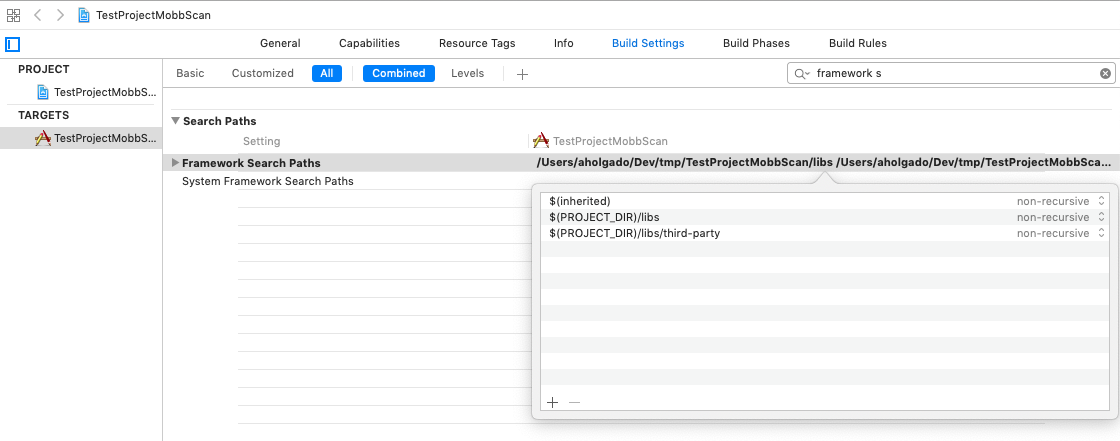
Sometimes, when you add the framework to the project, the source folder of the framework itself is not added correctly to the project's configuration. Please make sure that the folder is added to the Framework Search Paths in the Build Settings of the project.
SDK Example
An example application is included in the SDK. You can find it under the sample folder of the SDK.
The example app simply scans a Spanish identity document and then shows all the results on screen.