Configure the SDK
Android
MobbID Android SDK is distributed as several different .aar libraries. The core library and one additional library for each biometric technology.
In order to use SDK in your application you must follow these steps:
- Include the sdk libraries by copying it to your application’s libs folder and add this line (change it to the current version) to your
build.gradlefile (dependencies section):
dependencies {
    ...
    // MobbID SDK Android
    implementation(name:'mobb-commons-android-1.4.2', ext:'aar')
    implementation(name:'MobbIDSDK-Core-Android-5.0.0', ext:'aar')
    implementation(name:'MobbIDSDK-Face-Android-5.0.0', ext:'aar')
    implementation(name:'MobbIDSDK-Voice-Android-5.0.0', ext:'aar')
    implementation(name:'MobbIDSDK-Signature-Android-5.0.0', ext:'aar')
    implementation(name:'MobbIDSDK-Iris-Android-5.0.0', ext:'aar')
    implementation(name:'MobbIDSDK-Fingerprint-Android-5.0.0', ext:'aar')
    // This module is only needed if you will use the default UI for face recognition
    implementation(name:'MobbIDSDK-Face-UX-Android-5.0.0', ext:'aar')
}
- Add a flatDir repository to your
build.gradlefile so that gradle can find the.aarfiles in yourlibsfolder:
repositories {
    mavenCentral()
    flatDir {
        dirs 'libs'
    }
}
- Add third party dependencies and package exclusions to your
build.gradlefile. Each module does have its own:
dependencies {
    ...
    // MobbID 3rd party libraries provided in the .zip distribution file
    // MobbID SDK 3rd party libraries
    // CORE
    implementation 'com.google.code.gson:gson:2.7.0'
    implementation 'com.google.protobuf:protobuf-java:2.5.0'

    // FACE
    implementation "org.jetbrains.kotlin:kotlin-stdlib-jre7:1.1.2"

    // SIGNATURE
    implementation 'com.madgag.spongycastle:core:1.54.0.0'
    implementation 'com.madgag.spongycastle:prov:1.54.0.0'
    implementation 'com.googlecode.json-simple:json-simple:1.1'

    // FINGERPRINT
    implementation(name:"samsung-android-sdk-1.0.0", ext:'jar')
    implementation(name:"samsung-android-sdk-pass-1.2.0", ext:'jar')

    // VOICE
    implementation(name:"flac-encoder-0.2.3", ext:'jar')
    implementation 'com.android.volley:volley:1.0.0'

    // IRIS
    implementation(name:"camera-android-1.3.6", ext:'aar')
    implementation(name:'opencv-android-3.2.0', ext:'aar')
}
Permissions
You don't need to declare any permissions in your AndroidManifest.xml file since they are already declared in the libraries's AndroidManifest.xml and they will be merged automatically when you build your app.
Want to use a single biometric technology?
If you would use a single or a couple of technologies it's possible you can remove some of the dependencies. Check out each module's individual configuration:
- Configure Face technology
- Configure Signature technology
- Configure Voice technology
- Configure Iris technology
- Configure Fingerprint technology
iOS
MobbID SDK for iOS comes as a set of dynamic frameworks. This set is made up of some frameworks taking care of common functionality and the others gathering the functionality of each biometric technology.
In order to use the MobbID SDK in your applications you will need to embed the different frameworks in your app target. To achieve this you should follow these steps:
Start by creating a folder close to your app project and copying the supplied frameworks in there.
Open
Xcode, click on your project and select theGeneraltab for your app target.Locate the
Embed Binariessection and add in the MobbID frameworks. Automatically they will also be displayed under theLinked Frameworks and Librariessection.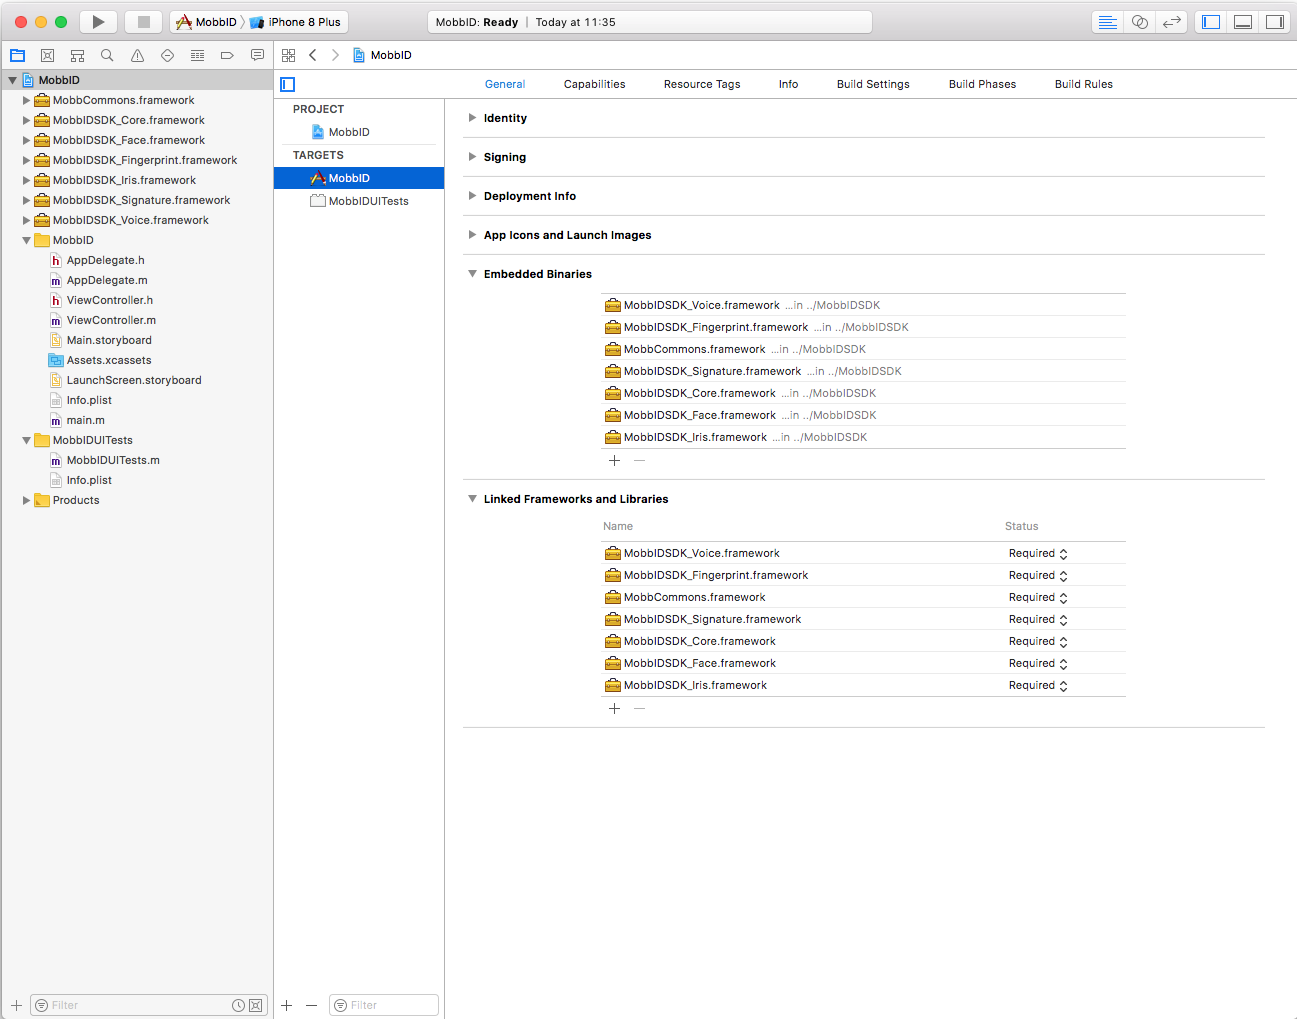
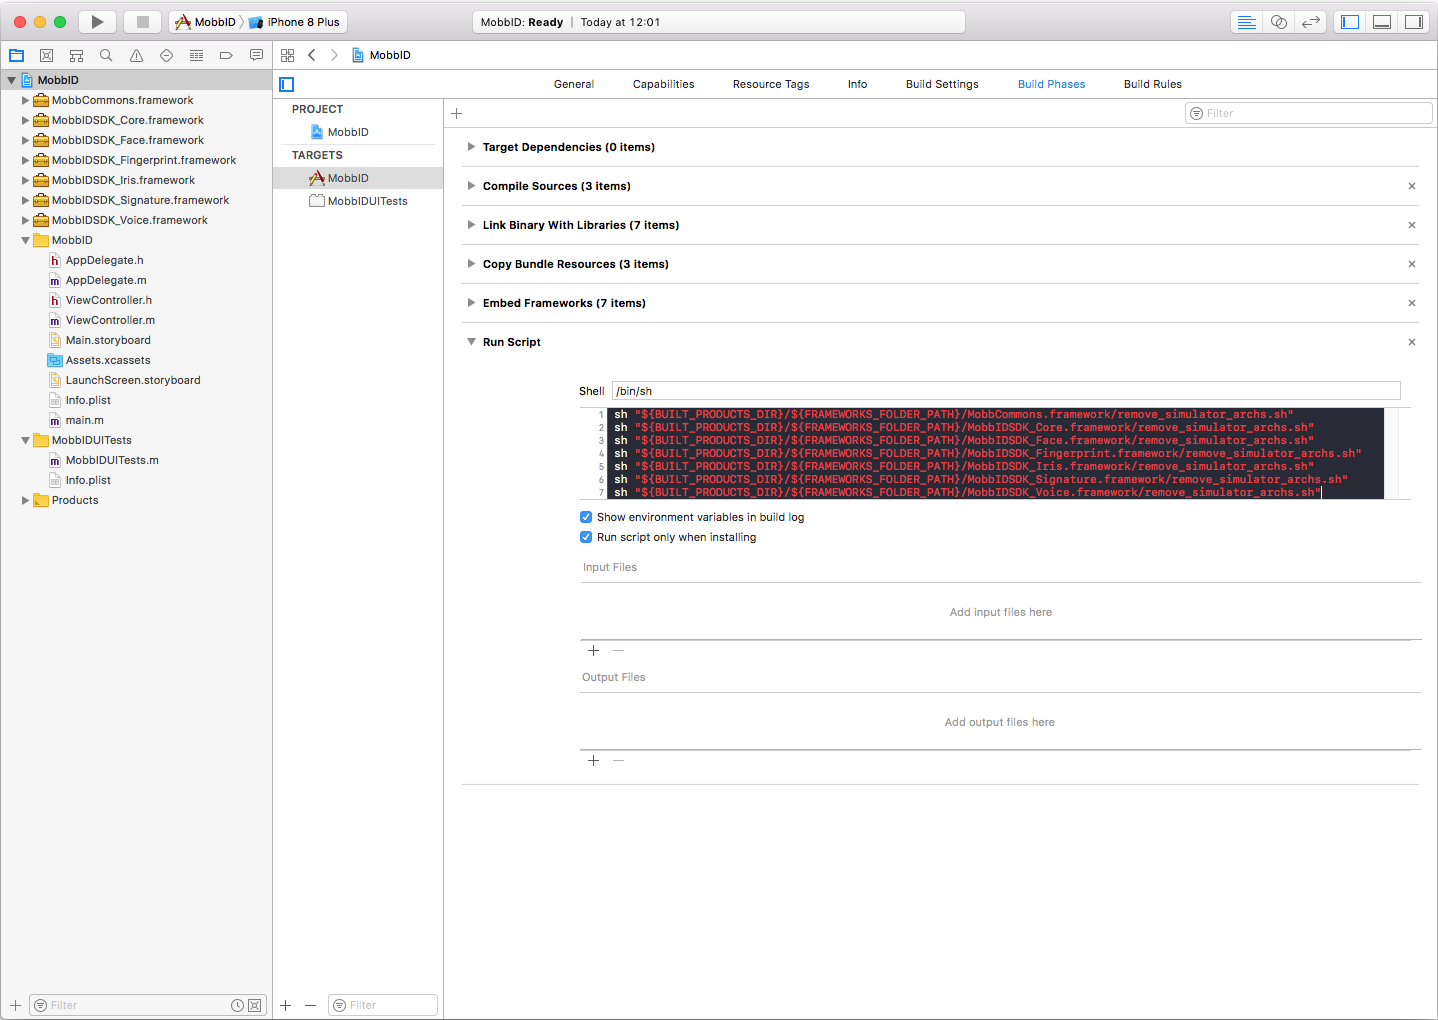
Before distributing your app to the App Store, you must strip the simulator binaries from the frameworks. To get this done create a new Run Script build phase for your app target to get rid off the simulators architectures included in the frameworks. Select the
Build Phases, click on the+icon and selectNew Run Script Phasein the drop down menu. Type these commands in the shell box:APP_PATH="${TARGET_BUILD_DIR}/${WRAPPER_NAME}" ## This script loops through the frameworks embedded in the application and ## removes unused architectures. find "$APP_PATH" -name '*.framework' -type d | while read -r FRAMEWORK do FRAMEWORK_EXECUTABLE_NAME=$(defaults read "$FRAMEWORK/Info.plist" CFBundleExecutable) FRAMEWORK_EXECUTABLE_PATH="$FRAMEWORK/$FRAMEWORK_EXECUTABLE_NAME" echo "Executable is $FRAMEWORK_EXECUTABLE_PATH" EXTRACTED_ARCHS=() for ARCH in $ARCHS do echo "Extracting $ARCH from $FRAMEWORK_EXECUTABLE_NAME" lipo -extract "$ARCH" "$FRAMEWORK_EXECUTABLE_PATH" -o "$FRAMEWORK_EXECUTABLE_PATH-$ARCH" EXTRACTED_ARCHS+=("$FRAMEWORK_EXECUTABLE_PATH-$ARCH") done echo "Merging extracted architectures: ${ARCHS}" lipo -o "$FRAMEWORK_EXECUTABLE_PATH-merged" -create "${EXTRACTED_ARCHS[@]}" rm "${EXTRACTED_ARCHS[@]}" echo "Replacing original executable with thinned version" rm "$FRAMEWORK_EXECUTABLE_PATH" mv "$FRAMEWORK_EXECUTABLE_PATH-merged" "$FRAMEWORK_EXECUTABLE_PATH" doneBecause this step is only needed for the
Archiveprocess, you should check the optionRun script only when installing.Finally, as MobbID may need to use the device camera, microphone or both, you will need to specify it. Open the information property list (
Info.plist) and add these properties and a proper message for each one:- Privacy - Camera Usage Description: This app needs access to the camera
- Privacy - Microphone Usage Description: This app needs access to the microphone
Now you can use all the MobbID SDK features. In case you would rather use just some of the biometric technologies, check out the following links to get your project configured:
- Configure Face technology
- Configure Signature technology
- Configure Voice technology
- Configure Iris technology
- Configure Fingerprint technology
... and that's it. We recommend taking a look at the biometric operations to start working with MobbID SDK for iOS.
Xamarin
MobbID SDK is available to be used in Xamarin platform in different flavours, as native libraries (Xamarin.Android, Xamarin.iOS) and Xamarin.Forms cross-platform library. This series of documents shows you how to configure MobbIDSDK using the Xamarin.Forms approach.
Note: If you would rather use the Xamarin native libraries approach, please contact us for further support.
MobbIDSDK wraps the bindings native libraries of both platforms (Android & iOS) offering a set of interfaces to be used within the shared code of Xamarin.Forms projects.
MobbIDSDK Xamarin.Forms is made up of three libraries:
MobbIDSDK.dllcontains the definition of the interfaces.MobbIDSDK.iOS.dllcontains the iOS implementation of the interfaces.MobbIDSDK.Android.dllcontains the Android implementation of the interfaces.
Besides, because MobbIDSDK is built on top of native binding libraries, those are also required in Xamarin.Forms apps.
MobbIDFrameworkBinding.dllMobbIDSDK iOS binding library.MobbIDSDKAndroidBinding.dllMobbIDSDK Android binding library.
Follow these simple steps to get your project set up:
Create a new
Blank Forms Appproject and click Next: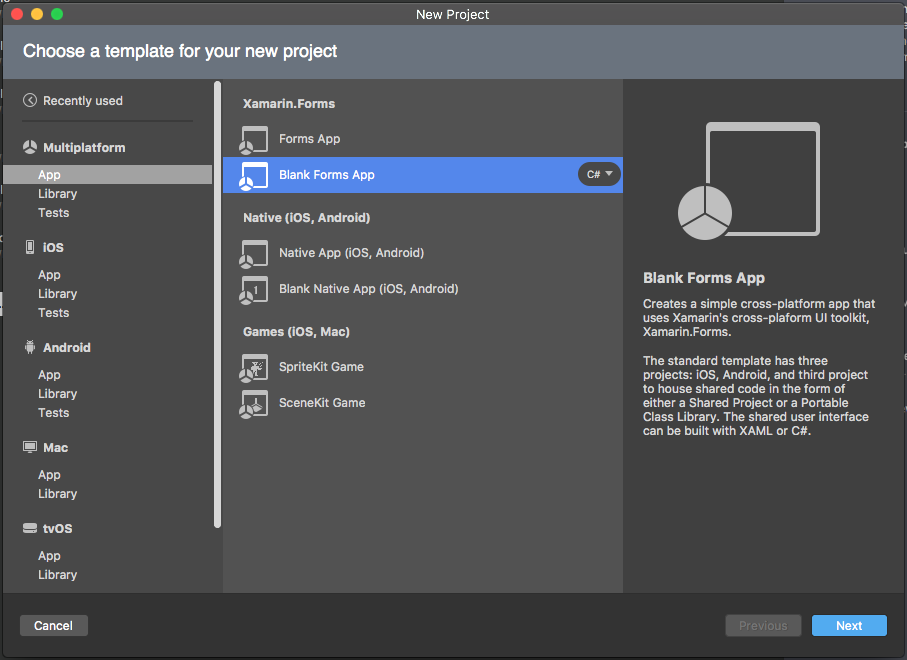
Type a name for your app and your organization identifier, set this configuration and continue until the end of the process:
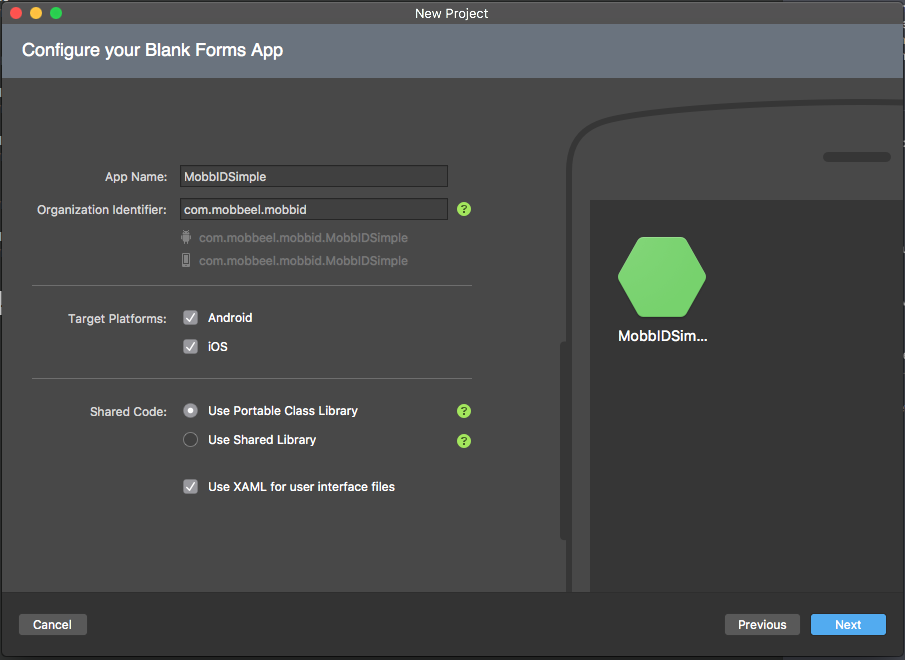
Get the MobbIDSDK libraries. You can locate them next to your project.
Link the MobbIDSDK libraries by adding references from:
Shared module will reference to
MobbIDSDK.dll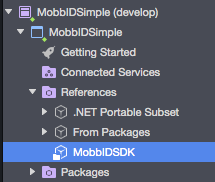
Android module will reference to
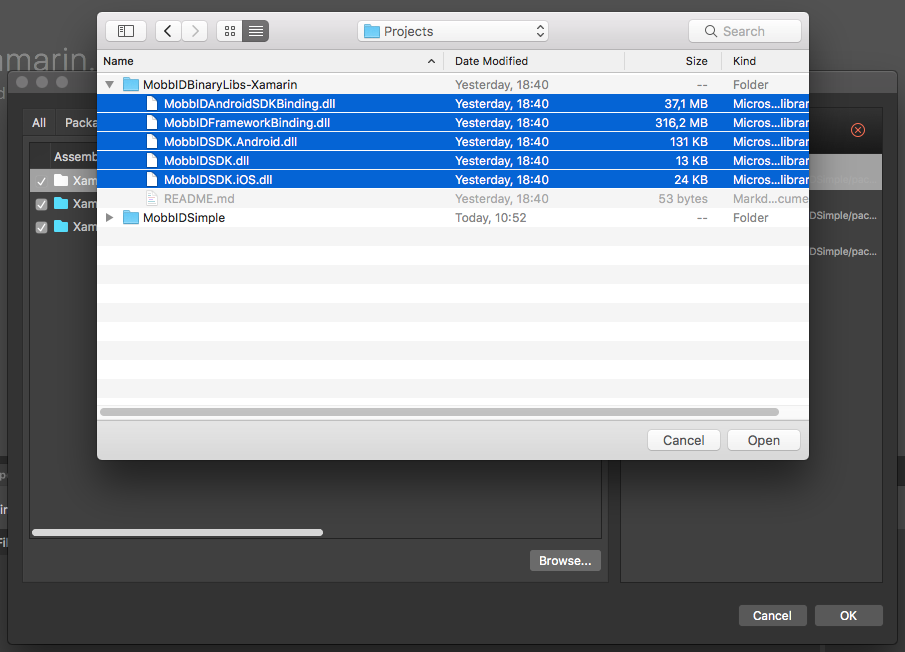
MobbIDSDKAndroidBinding.dllMobbIDSDK.dllandMobbIDSDK.Android.dll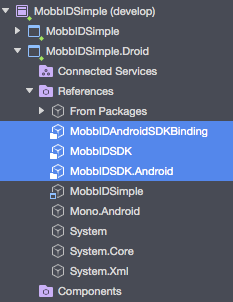
iOS module will reference to
MobbIDFrameworkBinding.dllMobbIDSDK.dllandMobbIDSDK.iOS.dll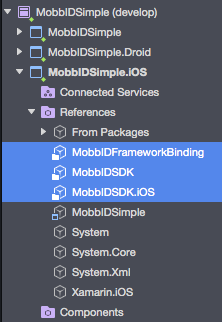
In order to add references from the different modules, you will need to double click on the
Referenceitem of each one and select them from the.Net Assemblytab.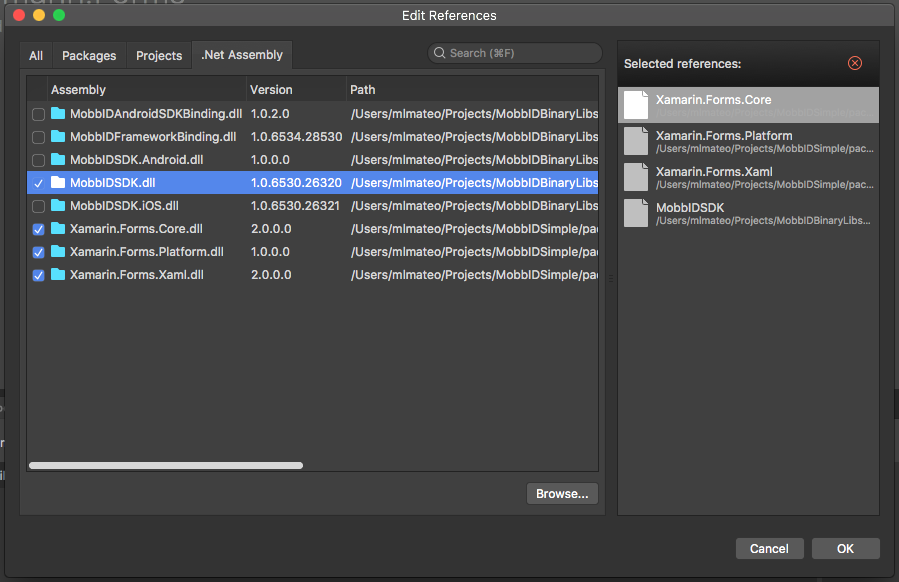
Note: First time you will need to click on
Browse..., locate the MobbIDSDK libraries, select them and click Open. After that you will be able to select the libraries from this tab
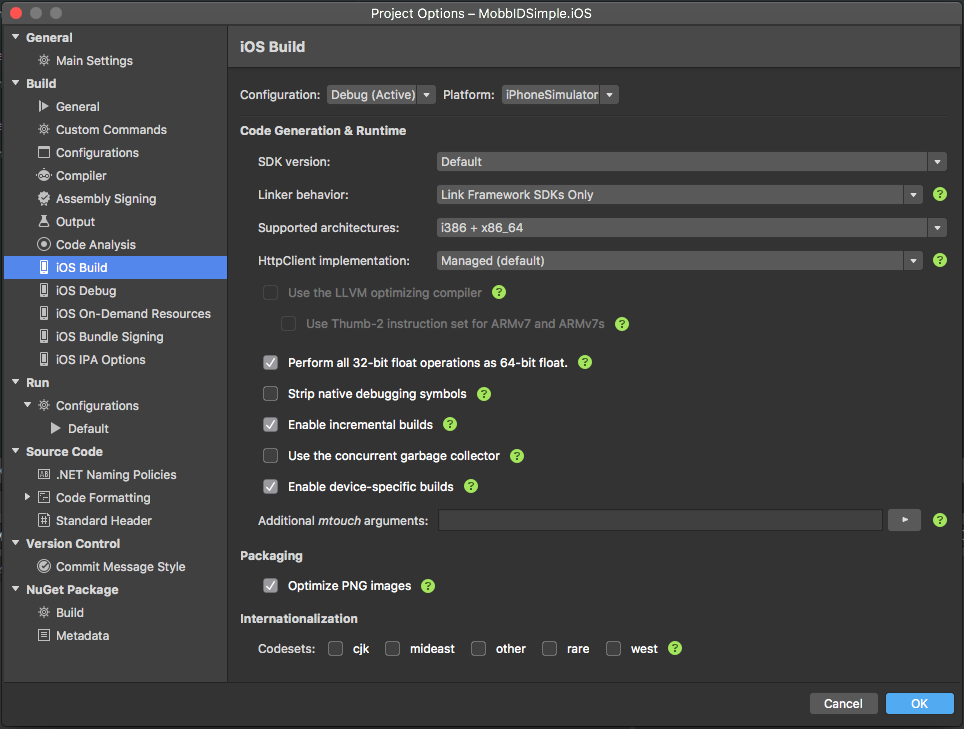
Note: If you need to compile your app in iOS simulators you will have to set the
Linker behavioroption toLink Framework SDKs Only. In order to achieve this, double click on the iOS module to open the Options panel. You will find this option underBuild > Build iOSsection.
SDK Example
An example application is included in the SDK. You can find it under sample folder of the SDK. The app showcases almost all the features available in the SDK letting you enroll and verify an user based on any of the biometric technologies available.
From Android Studio go to File -> Open and select <SDK>/sample/MobbID-AS/settings.gradle and in the “Import project from Gradle” dialog select “Use default gradle wrapper”. Once the import has finished you should be able to build and run the sample in your own device.
Locate the MobbIDSimpleDemo.xcproject Xcode project file and double click to open it. You can find it within
the distributed iOS SDK.
Just open MobbIDSimple solution located in MobbIDSimple-Xamarin/MobbIDSimple/MobbIDSimple.sln and run it on both devices iOS and Android.

